
MULTIRANGE ON DELAY TIMER RELAY
Model RT6-S10-U
IntroductionRT6-S10 and RT6M-S10 timer relays are used in all fields (industry, house, plant etc.) need controlls related to the time. |
 |
Specifications
| PARAMETER | VALUE |
| Operating voltage (Un) | AC 150V–260V and AC/DC 24V |
| Operating frequency | 50/60Hz |
| Operating power | < 4VA |
| Operating temperature | -20ºC ~ 55ºC |
| Timer (t) | 10sec, 100sec, 10min, 100min, 10hrs, 100hrs |
| Display | On led and Out (RLY ) led |
| Connection type | Terminal connection |
| Weight | max. 120 gr. |
| Contact | 5A/250V AC (Resister Load) |
| Mounting | Assembled on the DIN rail |
| Operating Altitude | < 2000m |
| Cable diameter | 1.5 mm² |
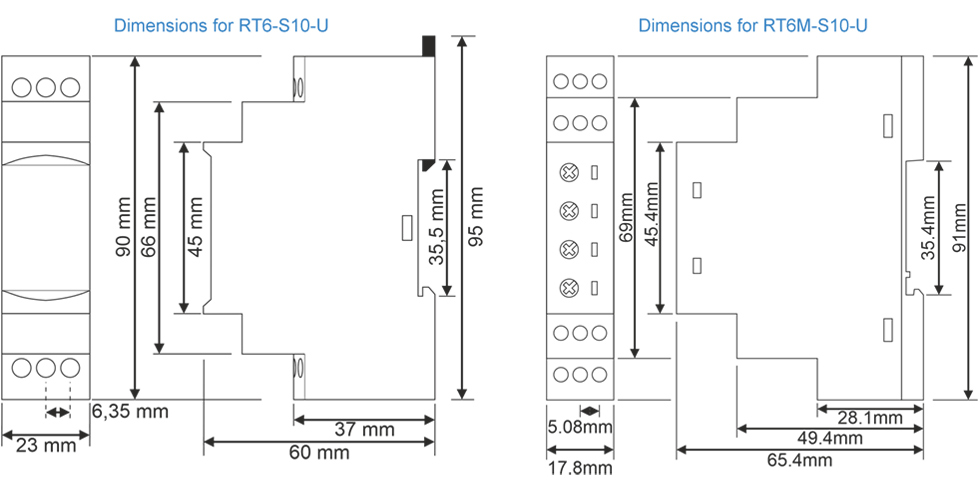
Dimension
Usage of Device and Working Principle
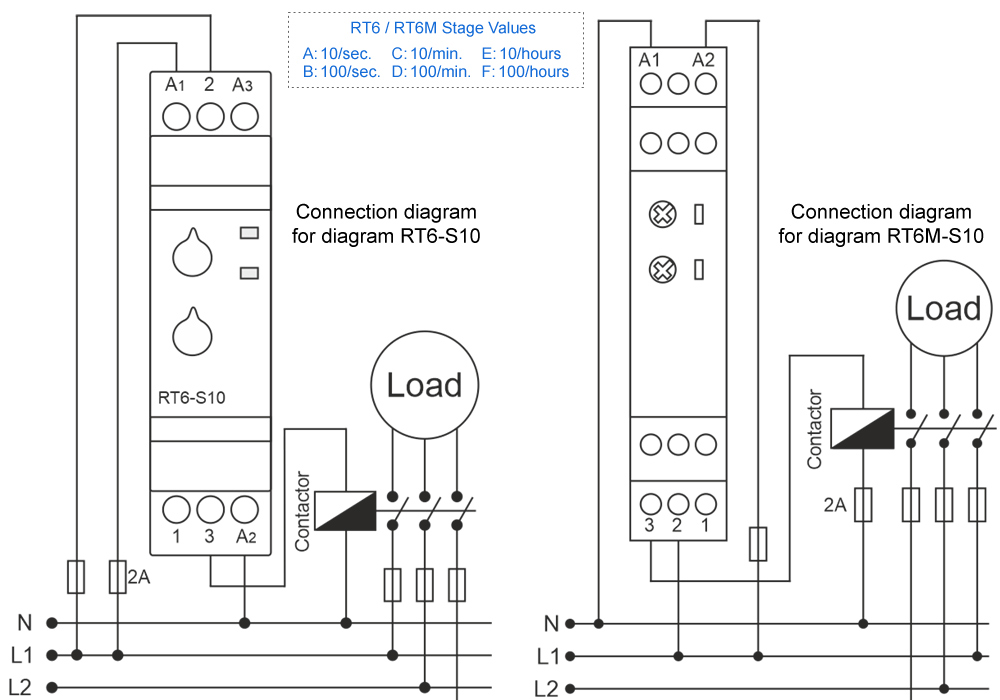
- Make the connections according to the diagram.
- Max.Time (Time Steps, TS ): Adjusts the stage and display the max.time.
- [ t ]: Divides the stage by 10 and multiply with displaying value.
* Example: Time is 75 minutes. - Make stage button to 100m (100 minutes) and turn “t” button between 7-8. In this case time is adjusted to 75 minutes.
* Note: In order to adjust much sensitive higher time values, set “t” by chronometer in low stages and in crease the stage to the time required.
* Example: Time is 25 hours. - Turn stage button to 10s (10 seconds) and “t” button between 2-3. Make power on and check with a chronometer for 2.5 seconds.
- Make the stage button 100h(100 hours). In this case, you set it more sensitive.
- After setting the time, power on the device. Device will start timing and meanwhile led switches on-off.
When device is timing relay contact 2 shorted to 1.
When the timing finish (set time is up) relay led is switches on stable and contact 2 shorted to 3.
Device keeps stable till the power is off.
Typical Connection Diagram
Maintenance
- Switch off the device and release from connections.
- Clean the trunk of device with a swab.
- Don’t use any conductor or chemical might damage the device.
- Make sure device works after cleaning.
Warnings
- Please use the device according to the manual.
- Don’t use the device in wet.
- Include a switch and circuit breaker in the assembly.
- Put the switch and circuit breaker nearby the device, operator can reach easily.
- Mark the switch and circuit breaker as releasing connection for device.
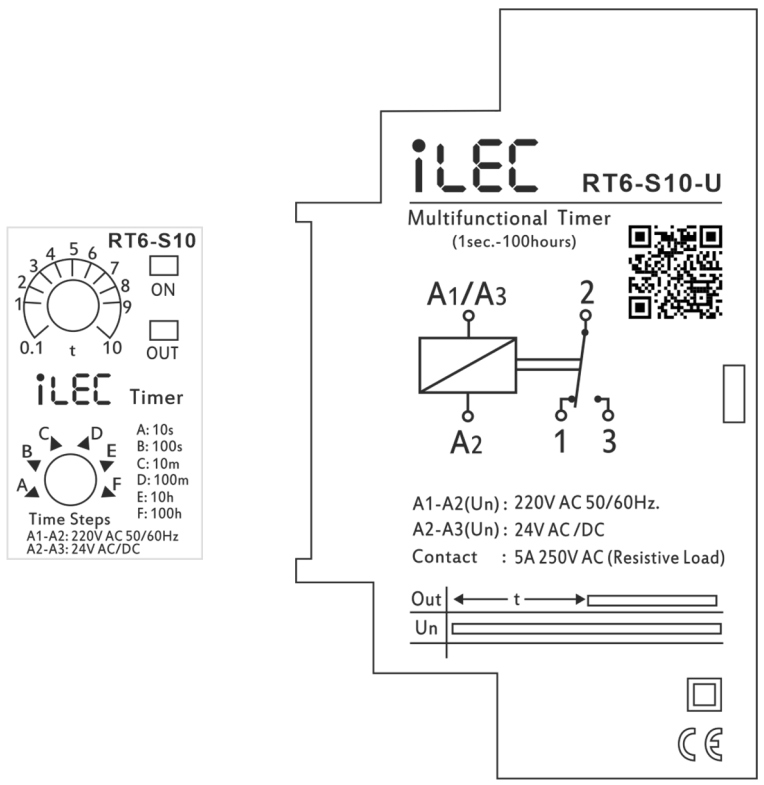
External description
Resources & Support
- Technical documents: Model RT6-S10-U
- Reference Articles: Operating Principles & Practical Applications
- Pricing & Ordering: Please visit !
